Nodes
Nodes are the fundamental building blocks of every workflow in GenAssist. Each node represents a specific action, function, or logical step in your automated process. By connecting these nodes on the workflow canvas, you define the flow of data and control the sequence of operations from start to finish.
This section provides a reference for each available node, explaining its unique purpose and configuration settings.
All nodes on the workflow canvas share a common structure and set of controls for configuration, testing, and management.
Anatomy of a Node
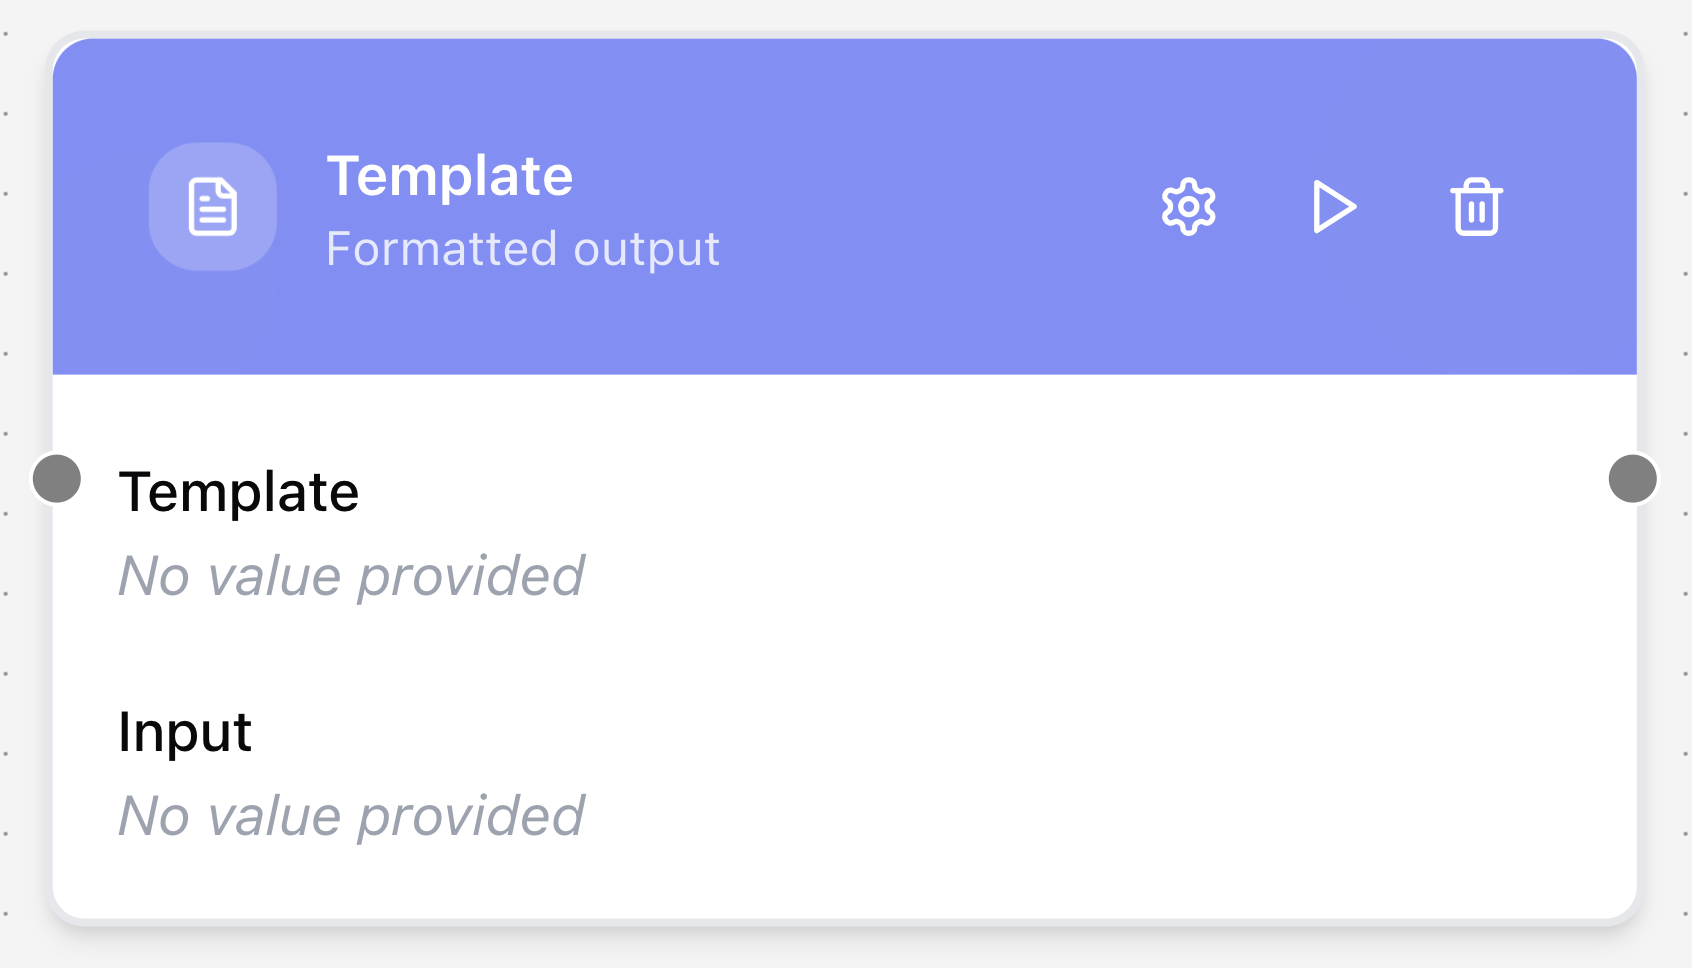
Each node consists of two sections:
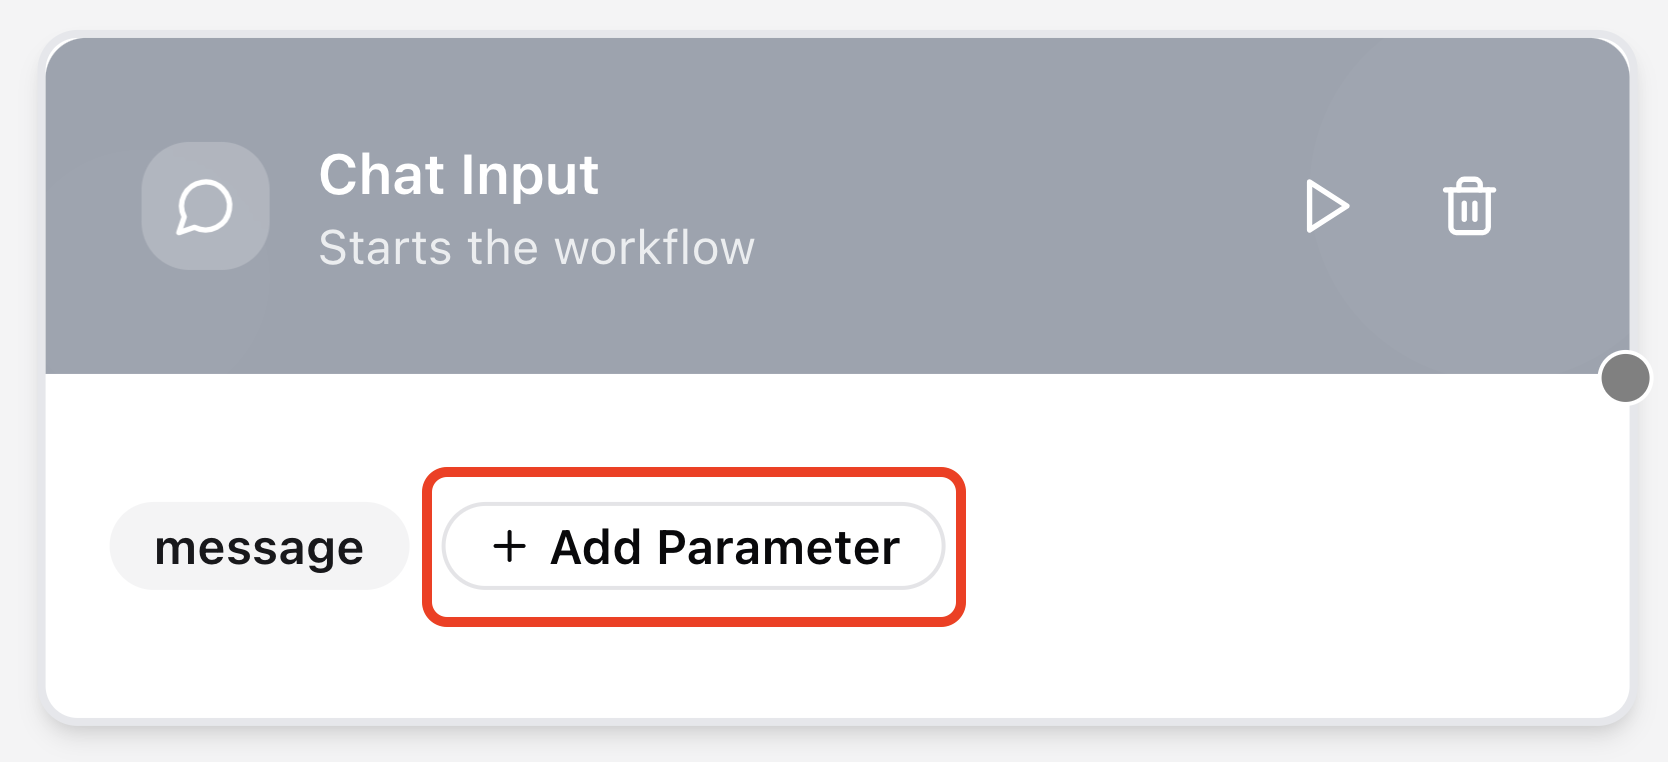
- Header is the top section of the node, which displays its name, a short description, and action icons.
- Body is the main section, which shows a summary of the node’s current configuration and its input parameters.
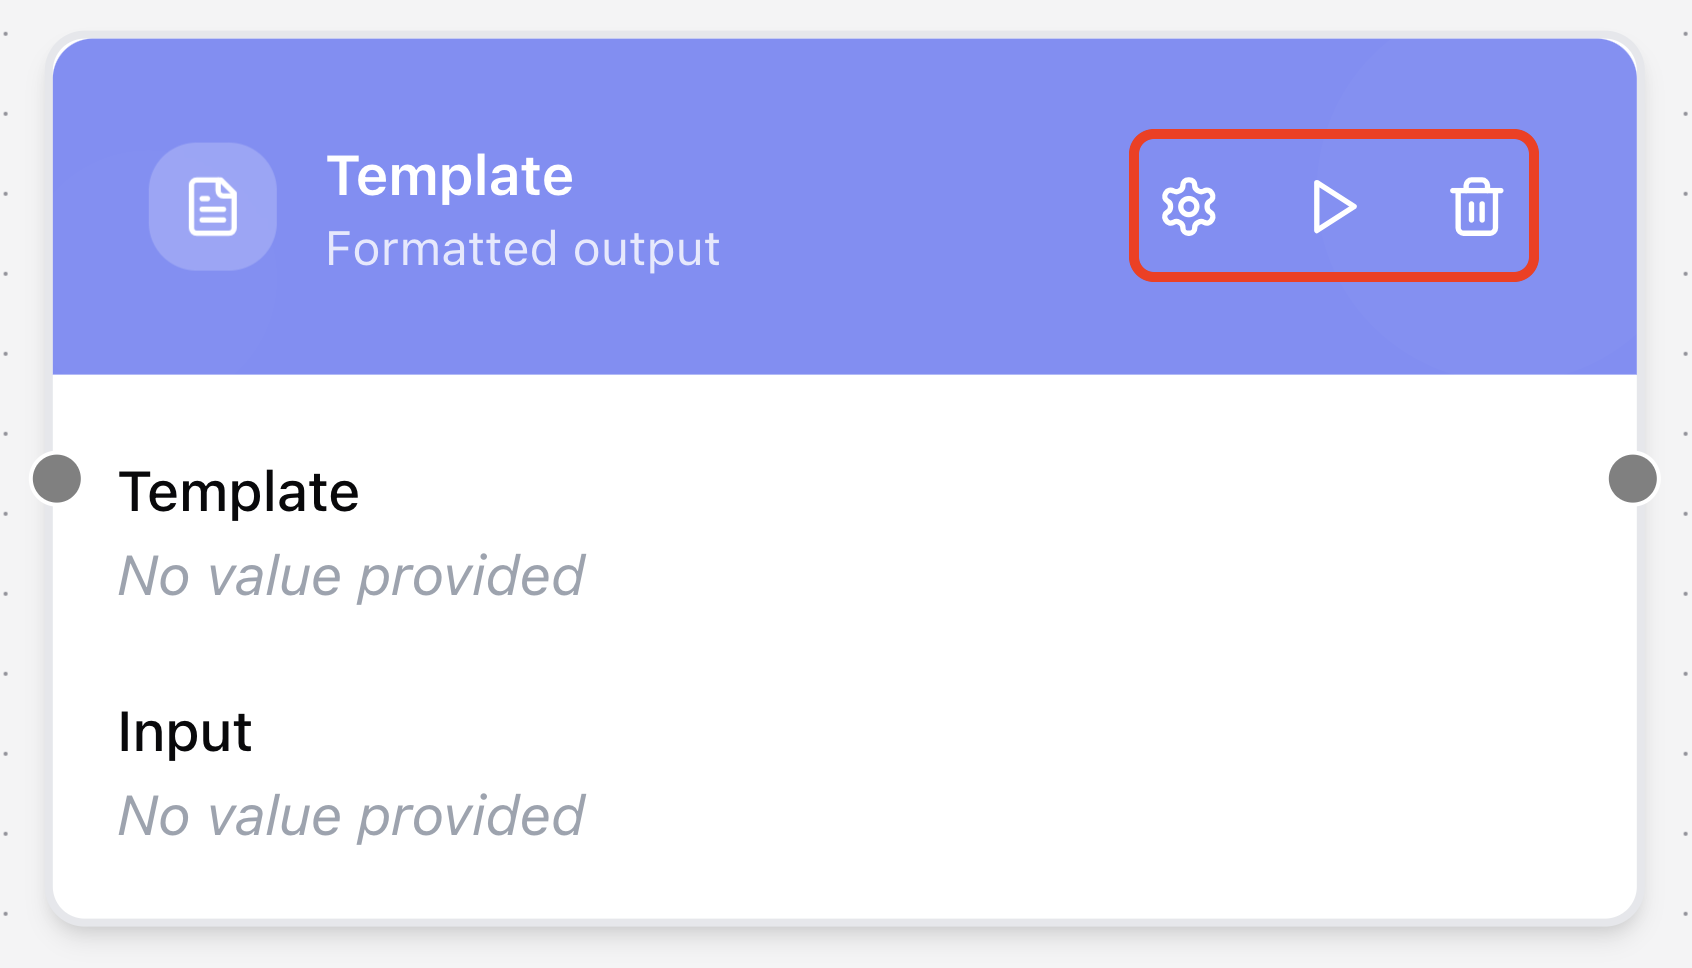
Action icons
You can interact with a node using the icons in its header.
- Click to open the node’s configuration dialog, where you can set its specific parameters and options.
- Click to test the node individually. This is useful for verifying its functionality before running the entire workflow.
- Click to remove the node from the workflow. A confirmation dialog will appear to prevent accidental deletion. Alternatively, you can select a node by clicking on it and press the Backspace key (on Windows) or the Delete key (on macOS) to remove it.
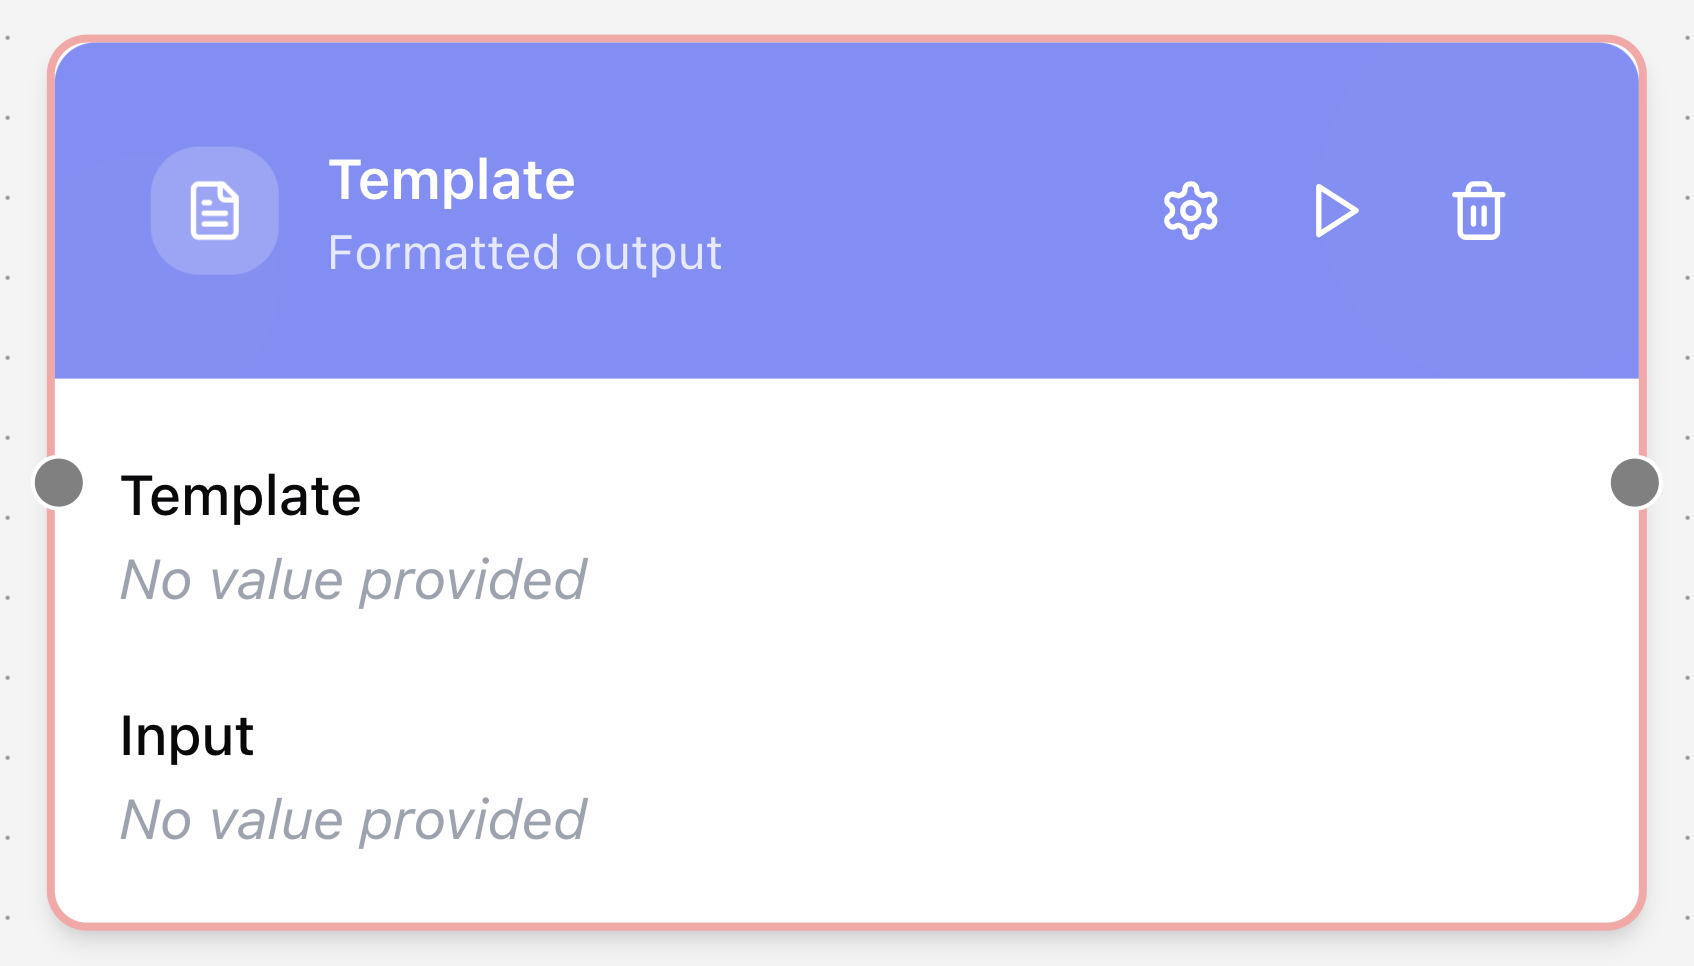
Node Validation
When you first add a new node to the canvas, it will have a red outline. This indicates that the node has not yet been tested. To validate the node and remove the outline, you must test it at least once. This system helps ensure that only correctly configured nodes are used in a workflow.
Managing Parameters
Some nodes allow you to define custom input parameters.
Adding a parameter
- Click the + Add Parameter button within the node’s body or configuration dialog.
- Click + Add new….
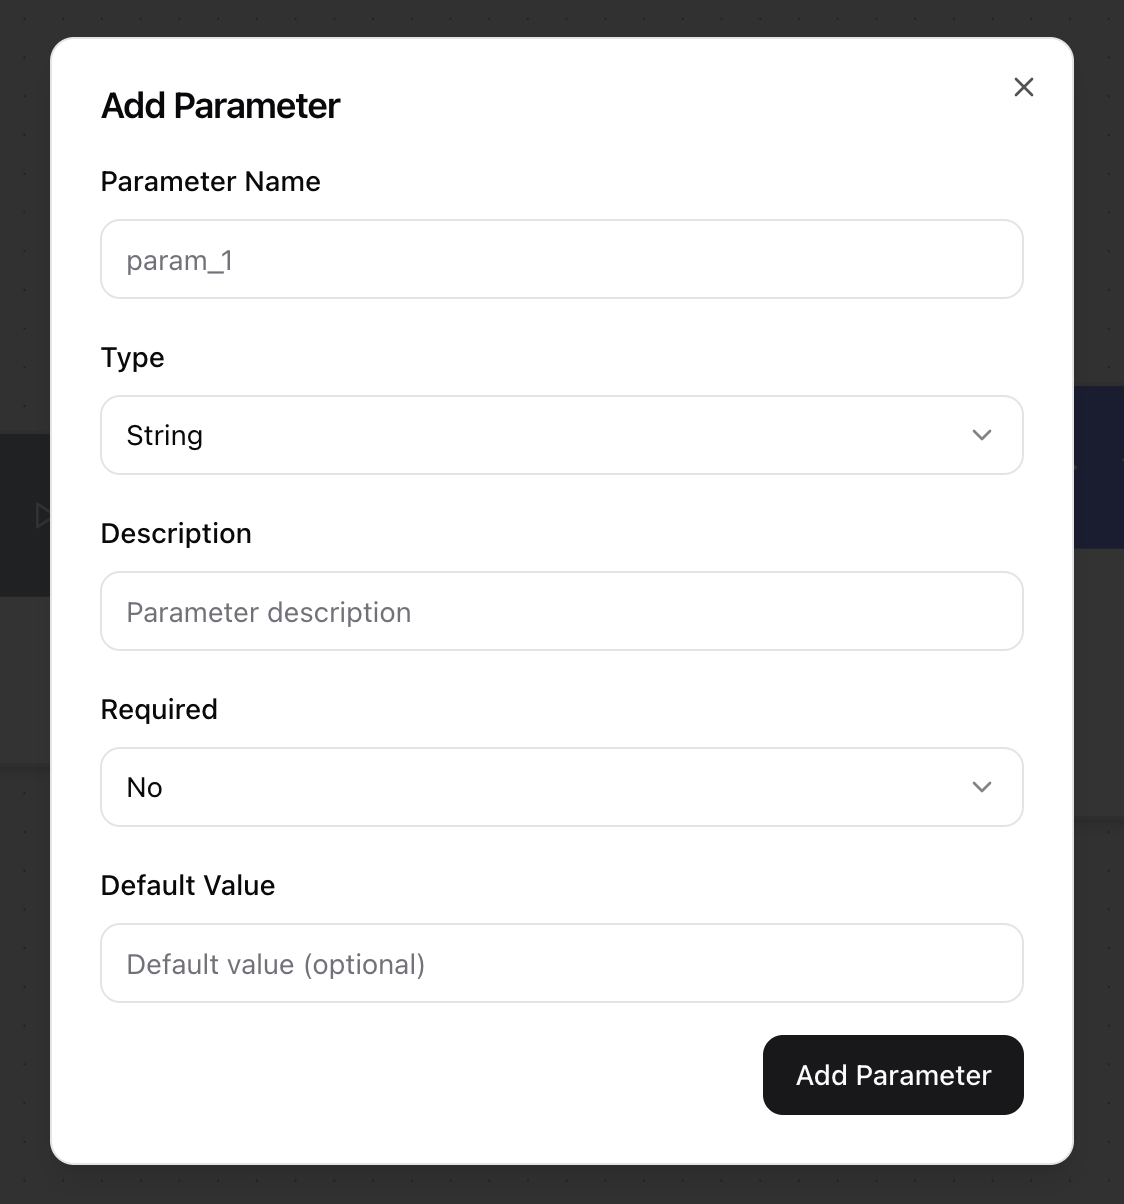
- The Add Parameter dialog will appear.
- Provide a Parameter Name.
- Select its Type (String, Number, Boolean, Object, Array, or Any).
- Enter a Description. (Optional)
- Specify if it is Required.
- Provide a Default Value. (Optional)
- Click Add Parameter.
Editing a parameter
- Click on the parameter’s name tag.
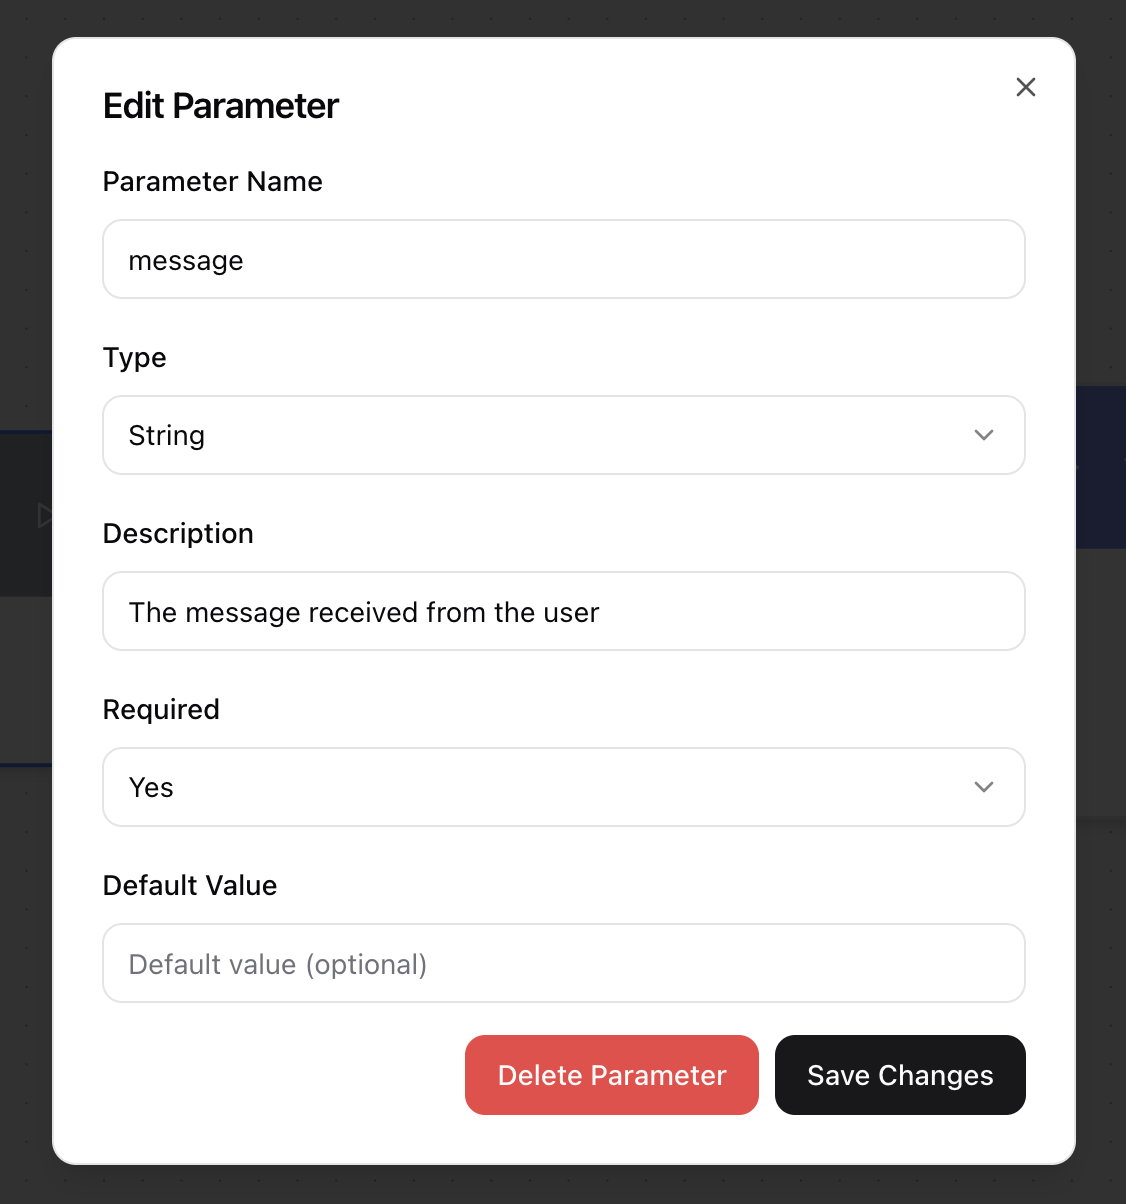
- The Edit Parameter dialog will appear, prefilled with the existing information.
- Make the necessary changes.
- Click Save Changes to save the changes.
Deleting a parameter
- Click on the parameter’s name tag.
- The Edit Parameter dialog will appear.
- Click Delete Parameter to permanently remove the parameter.
Using Variables in Nodes
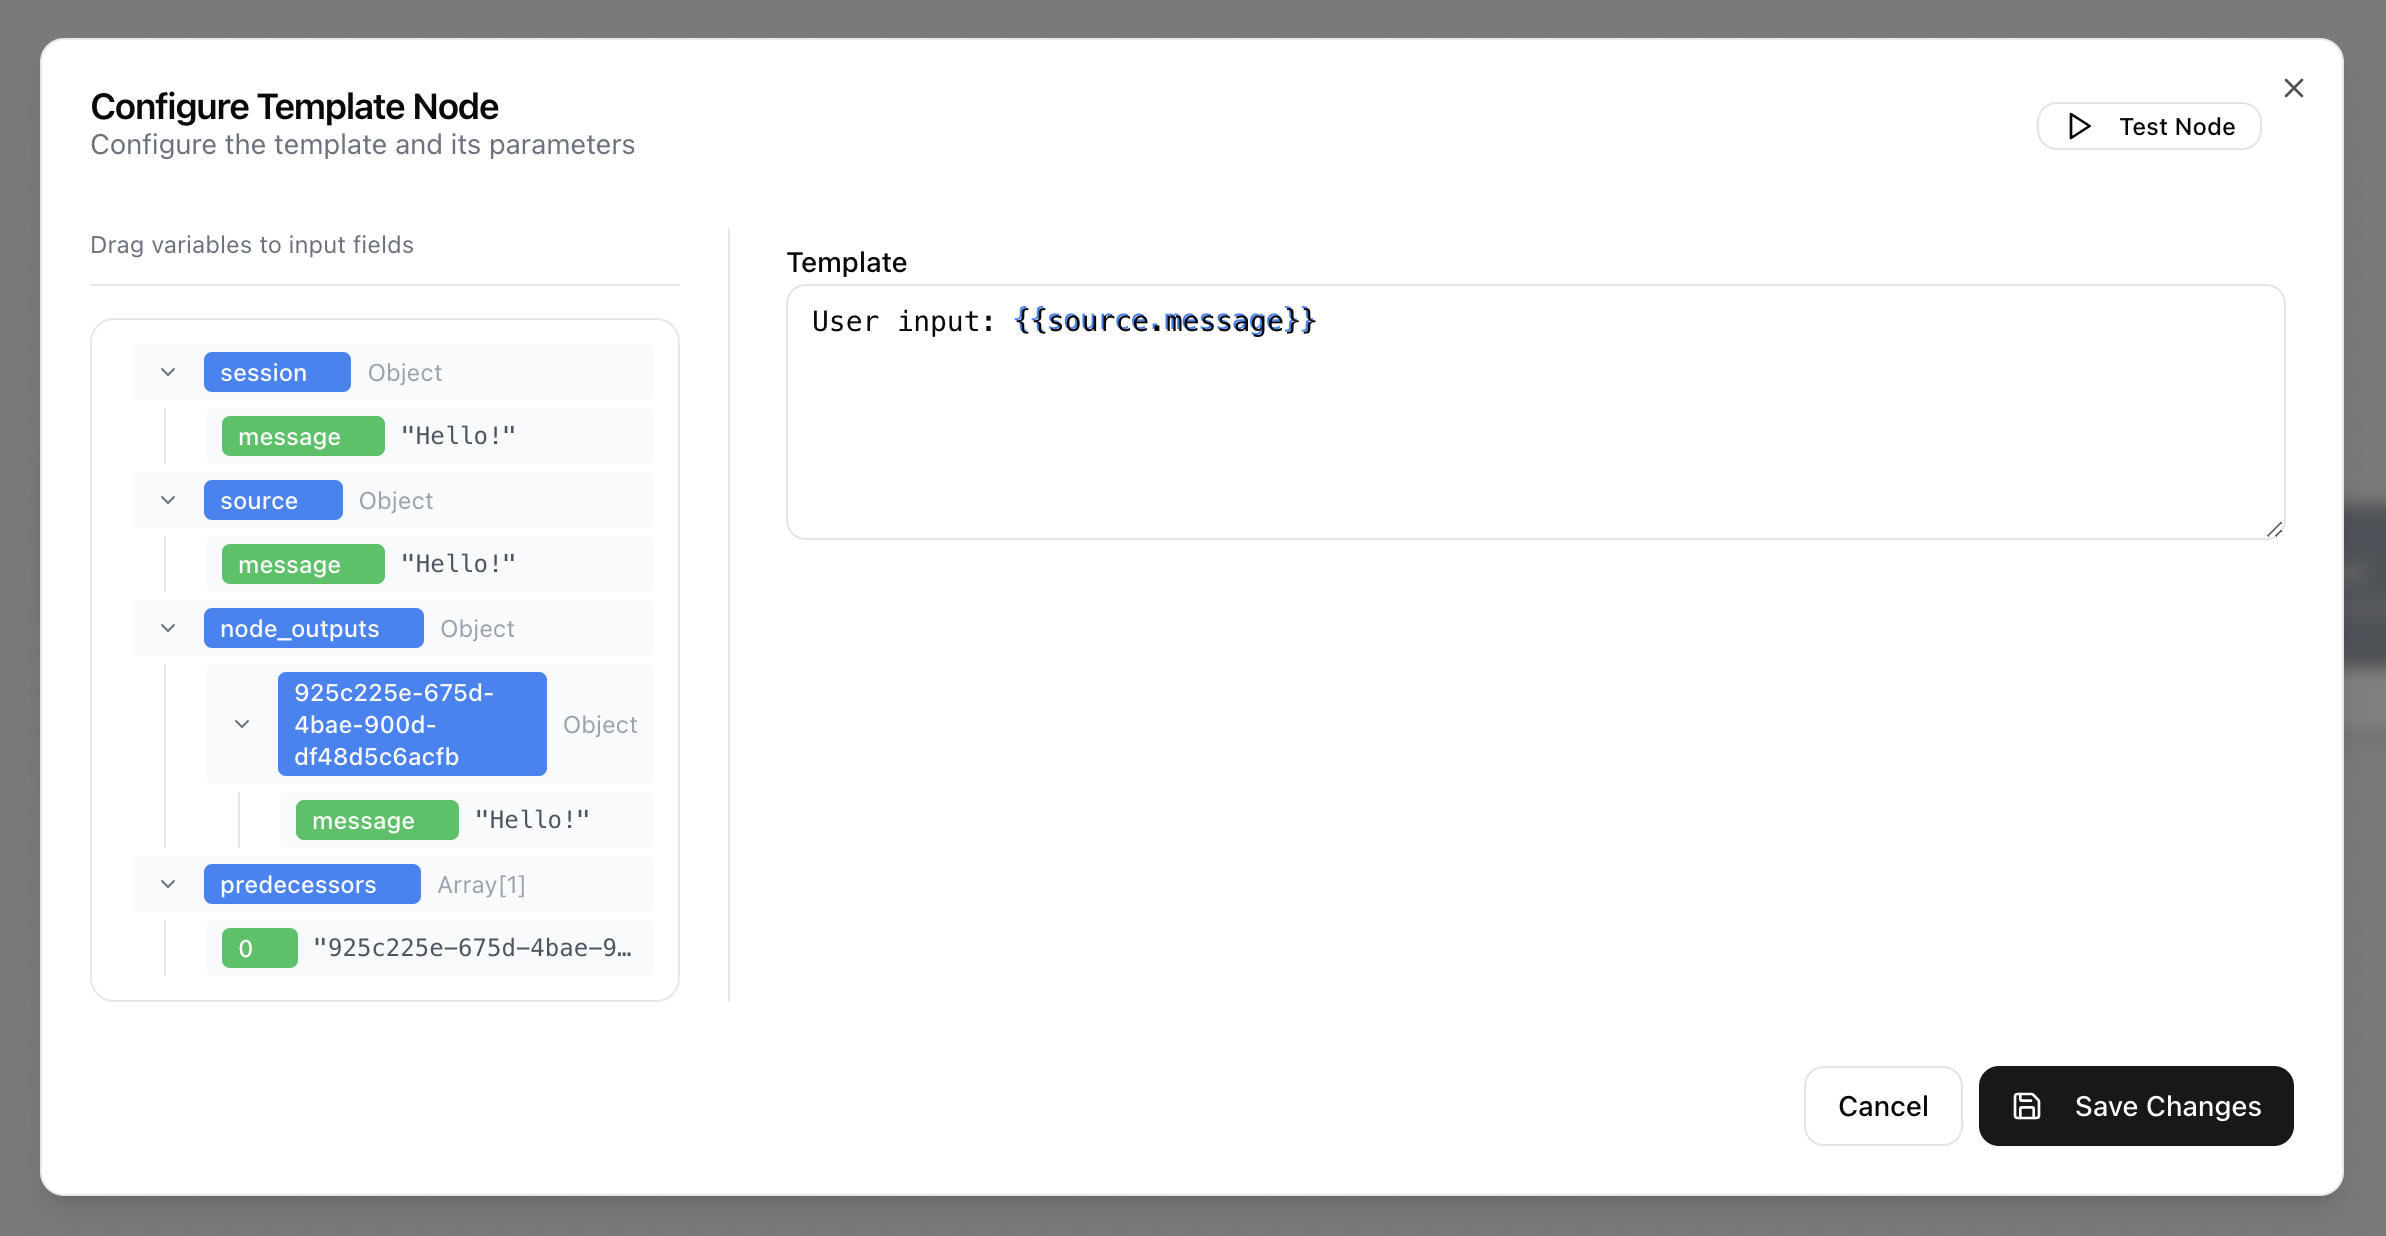
In most node configuration dialogs, a panel on the left displays available variables from the preceding nodes in the workflow. This feature allows you to pass data dynamically between nodes.
The variable panel is typically organized into the following categories:
sessionis an object that holds information about the entire user interaction from the very beginning. For example,session.messagecontains the initial input that started the workflow. This is useful for referring back to the original query at any point.sourceis an object that contains the direct output from the single node immediately preceding the current one. This is a convenient shortcut for accessing the most recent result in the workflow.node_outputsis an object that contains the results from all the nodes that have run before the given one. Each key inside this object is the unique ID of a preceding node, which you can expand to find its specific output data.predecessorsis an array containing the unique IDs of all nodes that come before the current node in the workflow.
You can reference these variables in your input fields, by dragging and dropping the variable or by typing {{category_name.variable_name}}.
If a node is not yet connected to any previous nodes, this panel will show a message indicating that data is unavailable. Once connected, the panel populates with outputs from the upstream nodes.