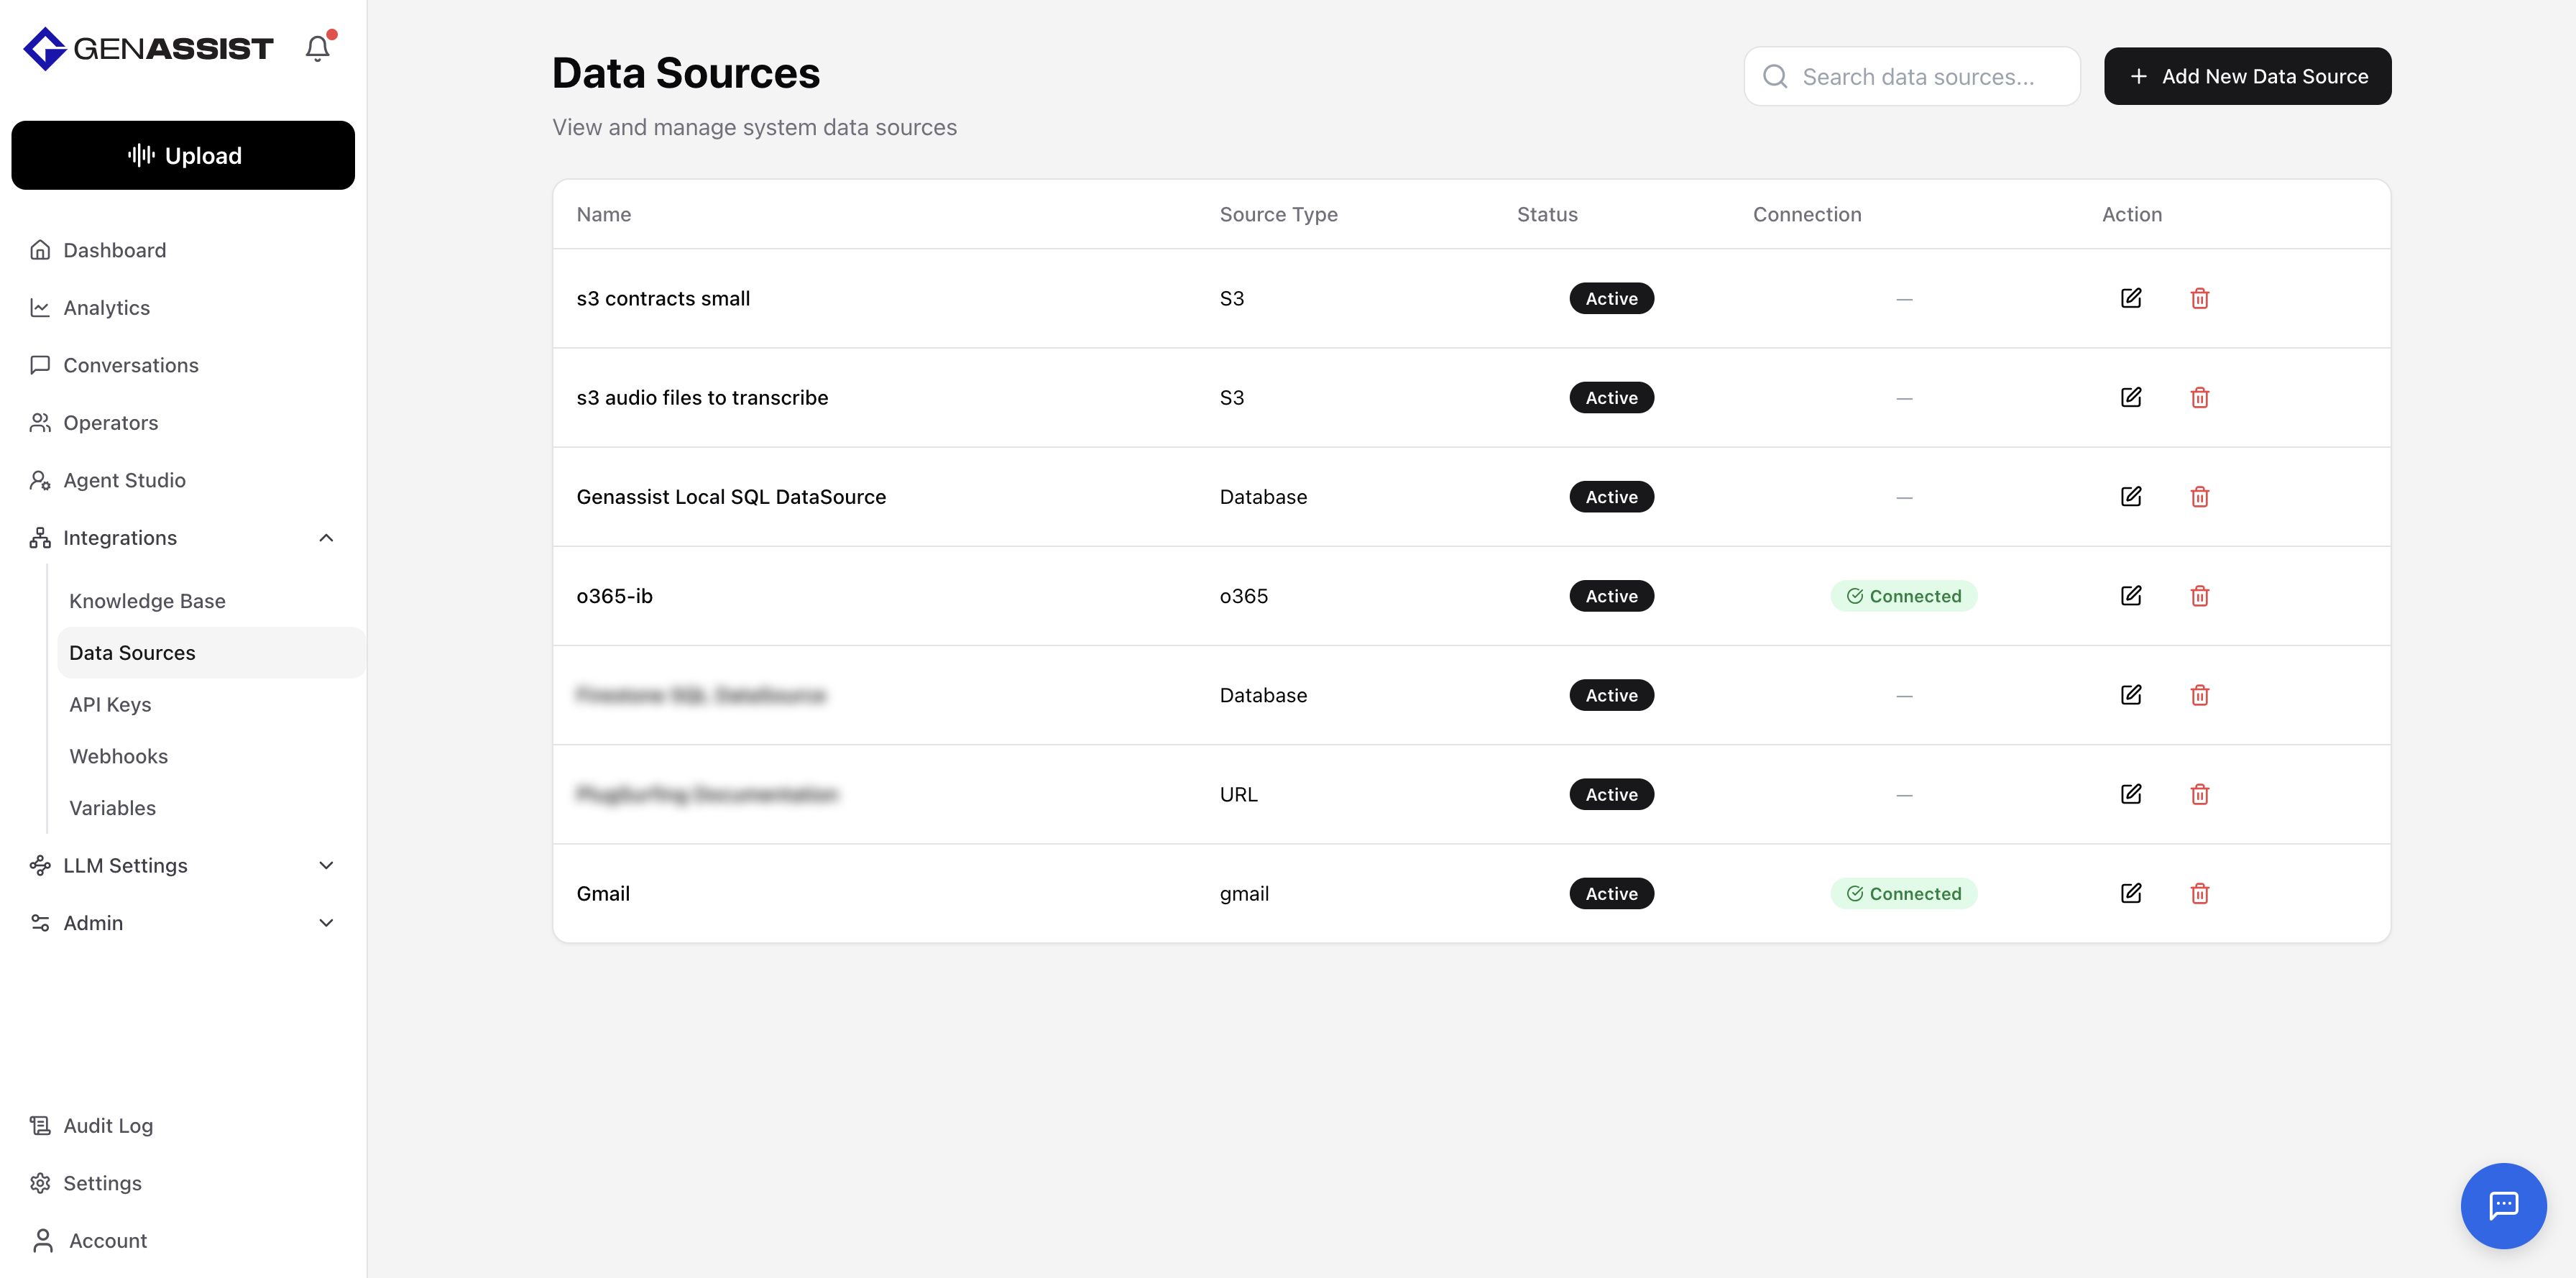
Data Sources
A data source is a reusable connection to a location where your information is stored, such as cloud storage, a database, or a web page. Centralizing these connections makes them available for various tasks within GenAssist. For example, creating a knowledge base requires selecting a preconfigured data source from which to ingest documents.
To manage your data sources, navigate to Integrations → Data Sources from the main navigation menu. This will display a list of all existing data sources.
Creating a Data Source
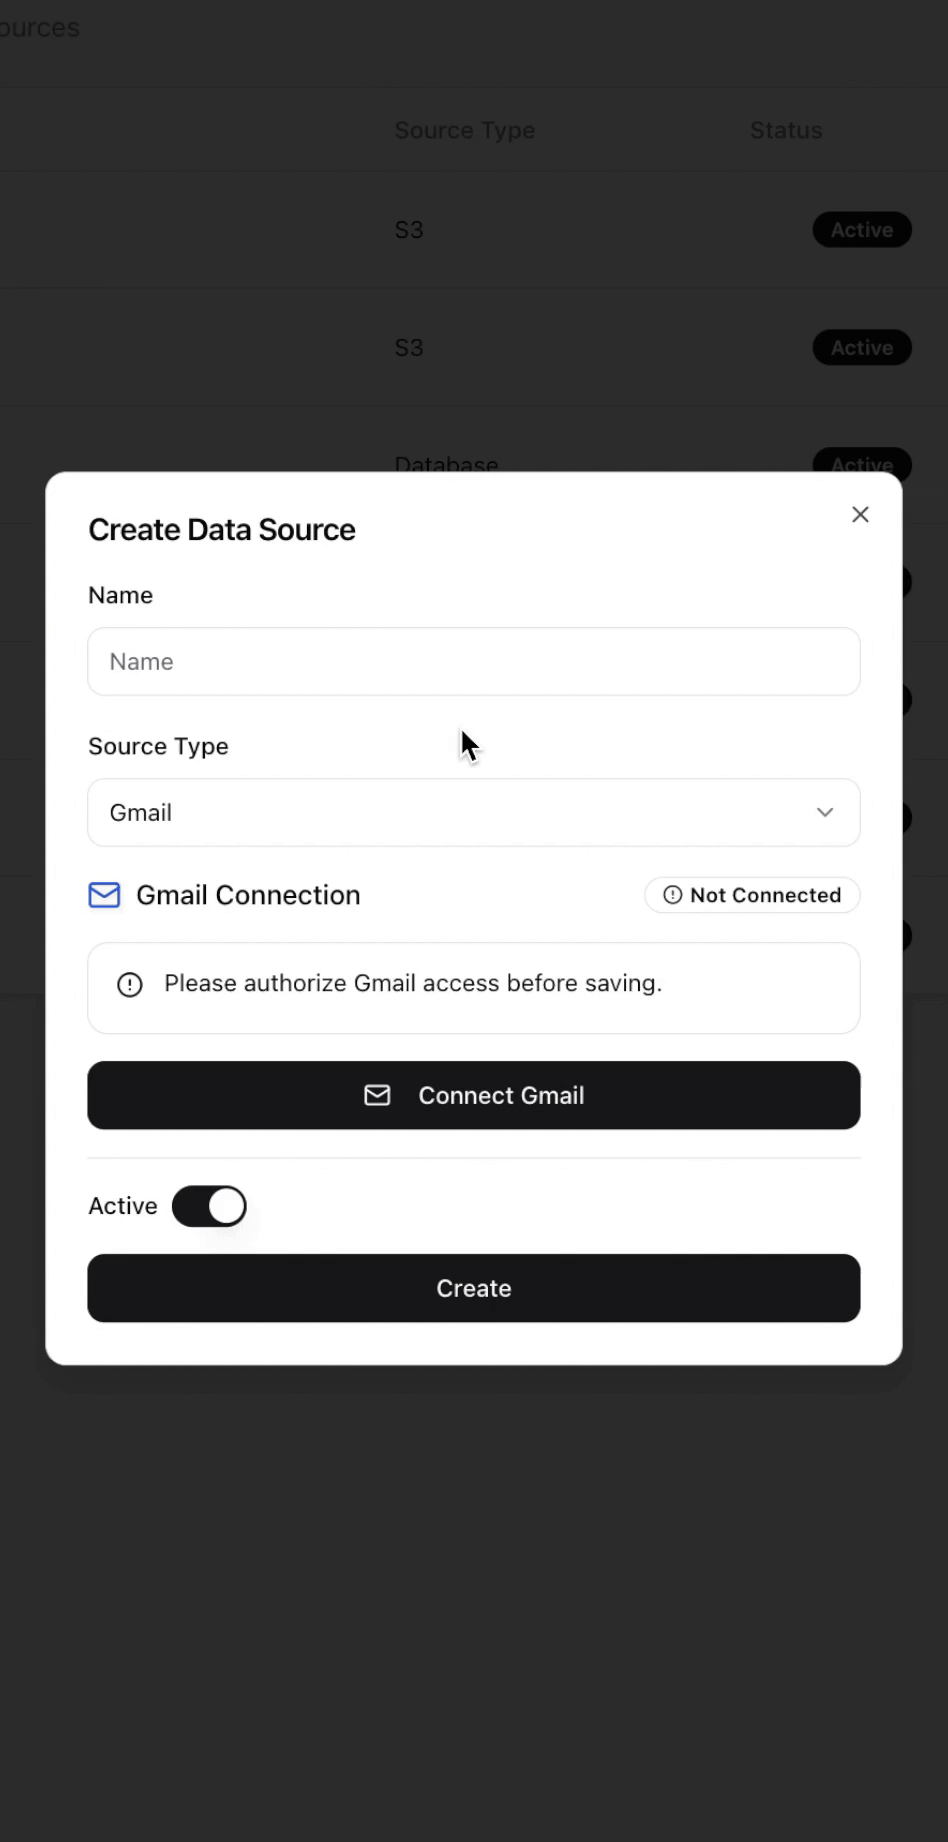
- Click the + Add New Data Source button in the top-right corner.
- The Create Data Source dialog will appear.
- Provide a Name for your data source.
- Select the Source Type from the drop-down menu. The required fields will change depending on the type you select. The available types are:
- Gmail: Connects GenAssist to your Google account to use your emails as a data source. You will need to authorize access.
- Office365: Links GenAssist to your Microsoft 365 account, allowing it to access your Office 365 data as a source. Authorization is required.
- S3: Integrates with an Amazon S3 bucket, enabling GenAssist to use files stored there. You will provide credentials like Access key and Secret key, and specify the Bucket name.
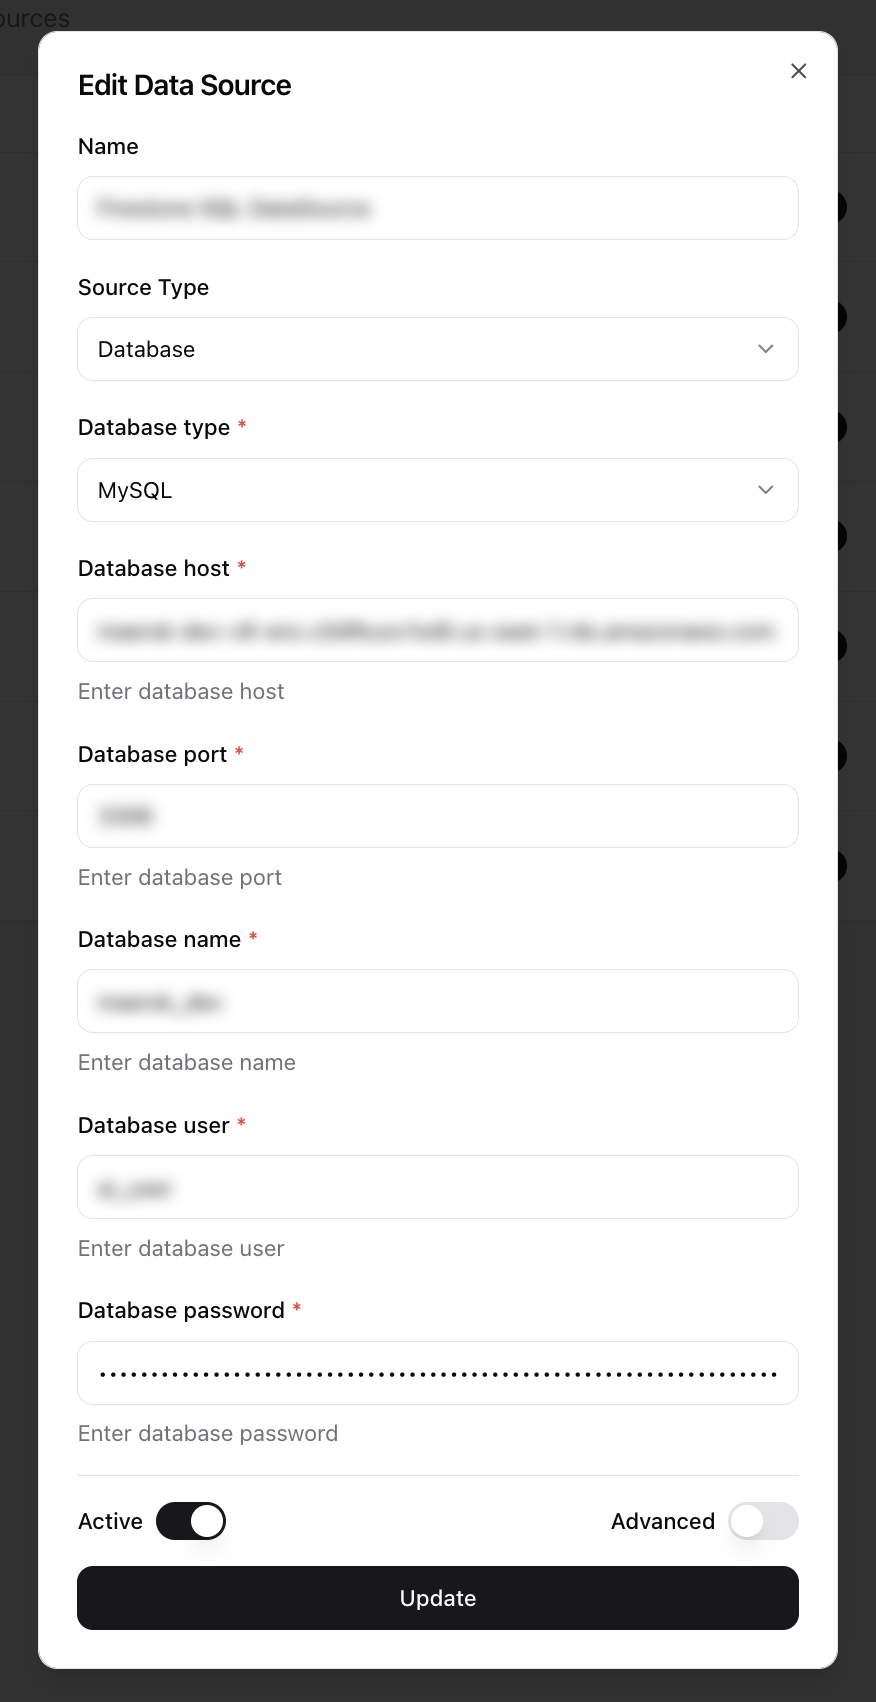
- Database: Connects to a specific database, allowing GenAssist to pull data from it. You will provide connection details like Database host, Database port, and Database name.
- URL: Uses content from a specific web page as the data source. You will provide the exact Web page URL.
- Toggle the Active switch to enable the data source immediately after creation.
- Click Create.
Editing a Data Source
- Click in the Action column.
- The same dialog used to create the source will appear, prefilled with the existing information.
- Make the necessary changes.
- Click Update to save the changes.
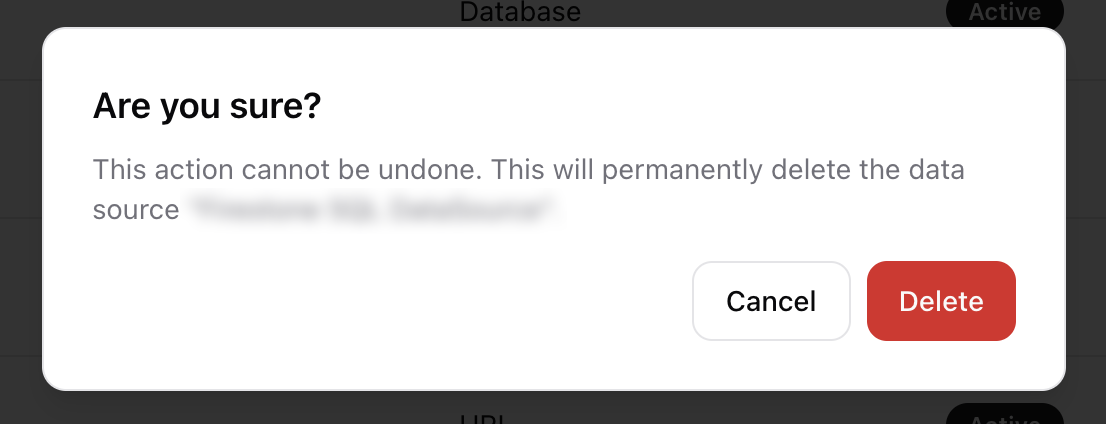
Deleting a Data Source
- Click in the Action column.
- A confirmation dialog will appear to prevent accidental deletion.
- Click Delete to permanently remove the data source.